

Are you looking to access a larger screen display for a presentation, classroom setup, or even just a movie night? Connecting your Chromebook to a projector is the perfect solution! With this step-by-step guide, it can easily be done in no time. Whether you are a beginner or novice with setting up projectors, this comprehensive guide simplifies the process and provides easy explanations of all the necessary components and connections. By the end of this post, you’ll be able to successfully connect your Chromebook to your projector with ease.
What is a Chromebook and why do you need it for a Projector?
A Chromebook is a laptop computer that runs on the Google Chrome operating system. It’s designed to be lightweight and fast, providing users with easy access to web-based applications and services such as Gmail, Drive, Calendar, Photos and more. Unlike traditional laptops, Chromebooks don’t come installed with programs like Microsoft Office or Adobe Photoshop; they rely solely on web-based applications.
When it comes to using a Chromebook for a projector, the advantages are clear. Chromebooks offer users portability and flexibility, allowing them to take their work anywhere. Because they’re based on web-based applications, they can be used in any environment and require no special software or hardware. Plus, they come with built-in security features that keep your data safe from attacks and other threats.
Chromebooks also come with a variety of apps that can help you stay productive while using a projector. Google Drive lets you create documents, presentations, spreadsheets and more; Google Calendar helps you keep track of tasks and meetings; YouTube allows you to watch videos and tutorials on how to use the projector properly; and Chrome Remote Desktop lets you access your computer from any compatible device. With all of these features, you can easily control your projector and get the most out of it.
What may you need to connect a Chromebook to a Projector?
Ports and adapters
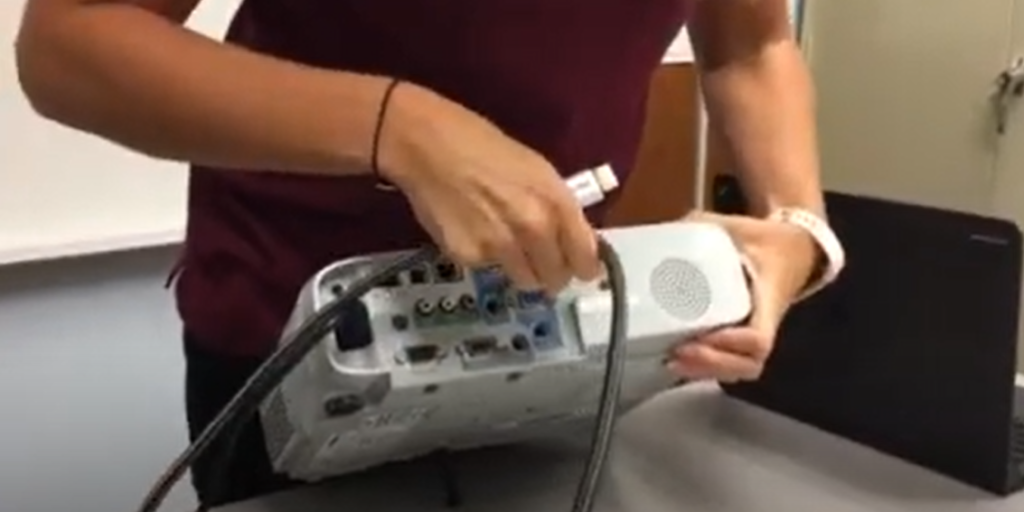
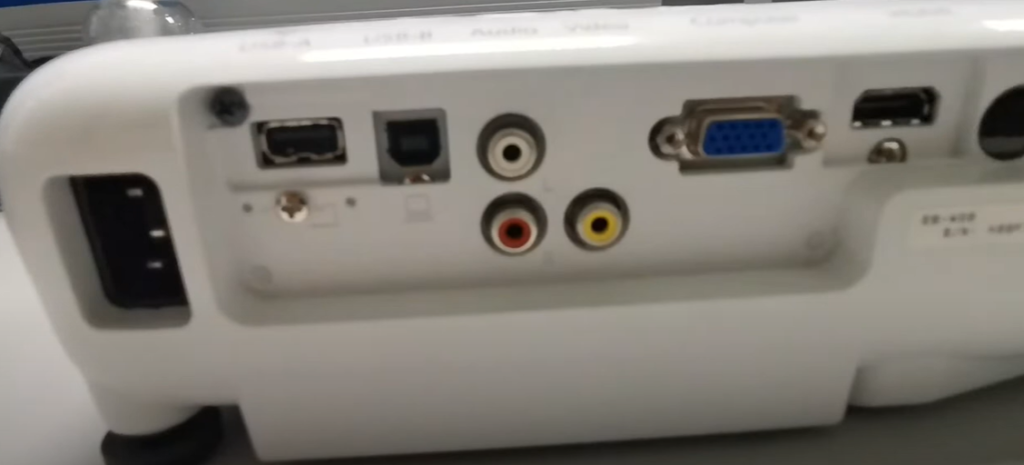
The most common way to connect a Chromebook to a projector is through the ports and the right adapter. Depending on what kind of port your projector has, you may need an HDMI cable or VGA adaptor to connect it to your Chromebook. You can buy these types of cables from any computer shop or online store. Some projectors also come with their own USB adaptors, which can be used to connect the Chromebook to your projector.
Wi-Fi Connections
Another way to connect a Chromebook to a projector is with Wi-Fi. This type of connection requires that both devices have network capabilities and are connected to the same wireless network. Once they are both connected, you can use an app or software to cast the Chromebook’s screen onto the projector. The advantage of this type of connection is that it is more flexible than a wired connection and doesn’t require any additional cables or adapters.
Miracast
Another option for connecting a Chromebook to a projector is Miracast, which is a Wi-Fi technology that allows two devices to communicate directly without having to go through a wireless network. To use Miracast with your Chromebook and projector, both devices must be compatible with the technology. Once connected, you can mirror your Chromebook’s screen onto the projector in full HD resolution. This type of connection is also great if you want to give presentations wirelessly without having to carry around a lot of cables or adapters.
Cables
If your projector is not compatible with Wi-Fi or Miracast, you can still connect it to your Chromebook using cables. Depending on what type of port your projector has, you may need an HDMI cable or a VGA adapter to connect it to your Chromebook. You can buy these types of cables from any computer shop or online store. If you don’t have the right type of cable for your projector, you can also buy a wireless display adapter to connect your Chromebook wirelessly. This way, you don’t need to worry about carrying around cables or adapters with you when you are giving presentations [1].
How To Connect Chromebook To Projector Via HDMI?
With Cable and Without Cable
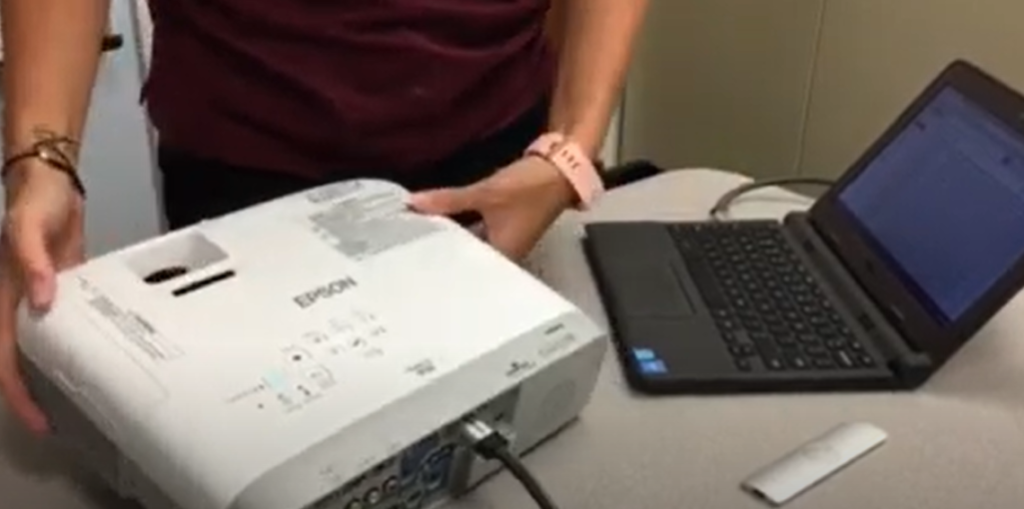
Connecting your Chromebook to a projector can be done in two ways: with a cable or without. If you are using a cable, connect one end of the HDMI cable to your Chromebook and the other end to the projector’s HDMI port. Once connected, press the key combination “Ctrl + Alt + Shift + S” on your Chromebook to display the projector’s image.
If you are using a wireless connection without a cable, make sure that both your Chromebook and the projector have Wi-Fi capabilities. Power on both devices and connect them to the same network. Afterward, open up the settings page of your Chromebook and select “Display Settings” from the list of options. From there, select “Connect to Projector” and then choose the projector from the list of available devices. Once selected, the image from your Chromebook will be displayed on the projector’s screen.
It is also possible to connect your Chromebook audio to a projector as well if it has audio capabilities. To do this, go back into your Chromebook’s settings page and select “Audio Settings”. From there, you can choose the projector from the list of available audio devices and then adjust your Chromebook’s volume accordingly.
What If The Chromebook Doesn’t Have An HDMI Port?
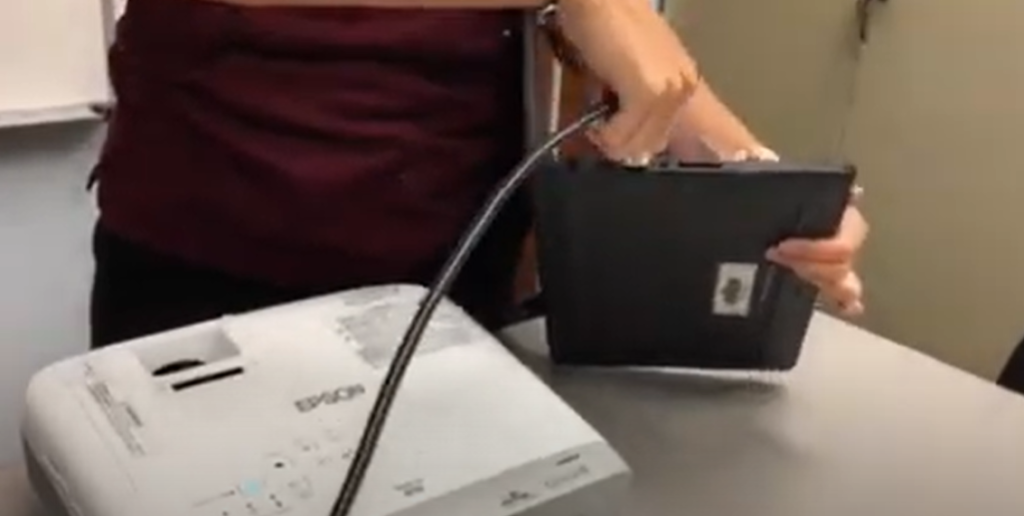
If your Chromebook does not have an HDMI port, you can still connect it to a projector or other external display with the help of an adapter. There are many different types of adapters on the market, so make sure to select one that is compatible with your Chromebook’s ports and the projector’s output. Once you have purchased the right adapter, simply plug it into your Chromebook and connect the other end to the projector. Afterward, you should be able to display the image from your Chromebook on the external display.
How To Mirror a Chromebook?
Mirroring your Chromebook is a great way to share your screen with others in the room. To do this, make sure that both your Chromebook and the projector are connected to the same Wi-Fi network. Afterward, open up your Chromebook’s settings page and select “Display Settings” from the list of options. From there, select “Connect to Projector” and then choose the projector from the list of available devices. After you have selected the projector, check the box next to “Mirror my screen” and then press “Ok”. Your Chromebook should now be mirrored on the projector’s screen. If needed, you can also adjust your Chromebook’s resolution so that it fits properly on the projector’s display.
How To Customize Your Chromebook Display?
You can customize your Chromebook display with the help of extensions and themes. Use the Chrome Web Store to find different themes and extensions that will change the look and feel of your Chromebook’s interface. Additionally, you can also make changes to color settings, font sizes, and more in the Chromebook settings. To access these settings, open up the Chrome browser and click on the three vertical dots icon located at the top-right corner of the screen. From there, select “Settings” and then go to “Appearances” to make changes to your Chromebook’s display. Once you are done making changes, be sure to save them by clicking the “Save” button at the bottom of the screen.
How To Connect a Chromebook To A Projector Wirelessly?
To wirelessly connect a Chromebook to a projector, you will need to first make sure that the projector supports wireless connections. Many projectors now come with built-in WiFi capabilities or support for external adapters. Once you have confirmed that your projector has this capability, you can begin the process of connecting it to your Chromebook. However, there are some other possibilities to connect a Chromebook to a projector.
Chromecast
Chromecast is a device that allows you to mirror your Chromebook’s display on an external monitor or projector. It works by connecting the Chromecast dongle to your projector’s HDMI port and streaming content from your Chromebook. Chromecast also supports wireless connections, making it easy to connect to most projectors.
BenQ InstaShow
BenQ InstaShow is a wireless presentation system that allows up to 64 devices to connect at once. You can use it to mirror your Chromebook’s display on an external monitor or projector wirelessly. The InstaShow is easy to set up and provides a secure connection. It also supports multiple users, allowing you to collaborate with others during presentations [3].
With Barco Clickshare
Barco Clickshare is a wireless presentation system that allows you to mirror your Chromebook’s display on an external monitor or projector. It works by connecting the Barco dongle to your laptop and streaming content from your Chromebook. The clickshare also supports multiple users, allowing you to collaborate with others during presentations. Additionally, it provides a secure connection and is designed for larger groups.
With Apple TV
Apple TV is a streaming device that allows you to wirelessly connect your Chromebook to an Apple TV-enabled external monitor or projector. It works by pairing the Apple TV with your Chromebook and streaming content from your computer. The Apple TV also supports multiple users, allowing you to collaborate with others during presentations. Additionally, it provides a secure connection and is designed for larger groups.
Third-Party Software Solution
There are also third-party software solutions available that allow you to connect your Chromebook to an external monitor or projector wirelessly. These solutions vary in features and capabilities but generally provide a secure connection and support for multiple users. However, not all of these solutions may be compatible with all projectors, so it is important to check compatibility before purchasing. Additionally, some of these solutions require additional hardware or software to work properly, so make sure to read the instructions carefully before setting up.
Tips For Connecting Your Chromebook To A Projector
When connecting your Chromebook to a projector, make sure that both devices are properly powered on and that they are connected to the same network (if applicable). Additionally, check that the projector has output capabilities compatible with your device.
Once both devices are powered on and connected to the same network, follow these steps to ensure a successful connection:
- Ensure that your Chromebook is mirroring its display by pressing “Ctrl” + “Full Screen” at the same time.
- Access the “Display Settings” menu and select the projector as your primary display.
- Resize the resolution of your Chromebook to match that of the projector if necessary.
- Adjust brightness and contrast settings as needed for optimal viewing quality on the projected image.
- If applicable, adjust the audio settings for better sound output from the projector.
To ensure that the projector is displaying content correctly from your Chromebook, you may want to periodically check the connection by pressing “Ctrl” + “Full Screen” again and re-selecting the projector as your primary display if necessary. Additionally, make sure that all cables are securely connected and free of any damage or debris. This will help reduce the chance of any disruptions in transmission and ensure a smooth connection between your device and the projector.
It’s also important to remember that not all Chromebook models are capable of connecting directly to a projector. If your model does not have this capability, you may want to consider investing in an HDMI or VGA adapter. These adapters can be purchased relatively inexpensively and will allow you to connect your Chromebook directly to a projector for an optimal viewing experience.
FAQ
Can you plug a Chromebook into a projector?
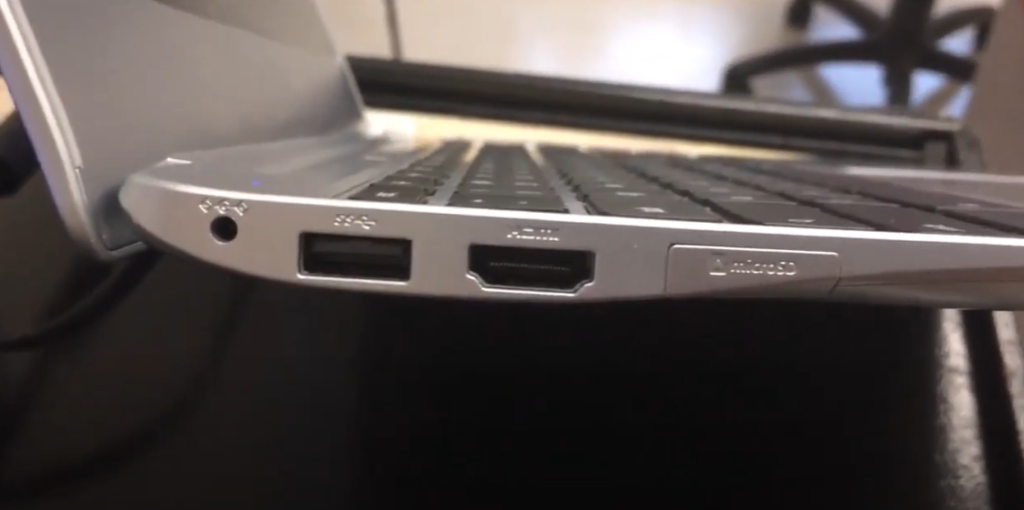
Yes, you can. All Chromebooks come with an HDMI port on the side which allows for easy connection to a projector or external display. Additionally, many Chromebooks also have USB Type-C ports that support DisplayPort Alt Mode and offer a direct connection to a compatible projector or monitor without additional adapters. However, depending on your specific model of Chromebook there might be some additional setup needed.
What type of ports do Chromebooks have?
Most Chromebooks, known for their sleek and lightweight design, boast a versatile range of connectivity options. In addition to at least one USB Type-C port, which ensures fast data transfer and charging capabilities, you’ll typically find a selection of USB Type-A ports for conveniently connecting various peripherals. Moreover, many models come equipped with HDMI and/or DisplayPort outputs, allowing you to effortlessly connect external displays or projectors. To further enhance convenience, Chromebooks often include an SD card reader slot, enabling easy file transfer, as well as audio jacks for seamless audio connectivity. With these comprehensive connectivity features, Chromebooks offer a seamless and efficient user experience.
Can I use a Chromebook for gaming?
Chromebooks are not typically designed for intensive gaming, but they can be used to play certain casual games or stream content from services like Steam Link and Google Stadia. However, these will likely require the use of an external controller connected via USB or Bluetooth to get the best experience. Additionally, it’s important to keep in mind that Chromebooks are not compatible with Windows software or programs, so you may not be able to play some of the more intensive games available on the market. Nevertheless, if you’re looking for a device mainly for casual gaming, streaming content, or light web browsing then a Chromebook can certainly meet your needs.
How do I project my Chromebook with HDMI?
Projecting your Chromebook with an HDMI connection is easy. All you need to do is connect one end of the HDMI cable to your Chromebook’s HDMI port, and the other end into a projector or TV. The device will automatically detect the external display and allow you to select how it should be used (i.e., mirroring or extending). If everything is plugged in correctly, you should be able to see your Chromebook’s display on the projector or TV screen.
What is the best way to maximize battery life on a Chromebook?
There are several steps you can take to maximize your Chromebook’s battery life: first, adjust the brightness of your display, as the brighter it is, the more energy it uses; second, reduce your use of resource-intensive apps and programs; third, turn off Bluetooth connectivity when it’s not in use; fourth, ensure that your Chrome browser is up to date with the latest version; fifth, keep an eye on background applications and disable any unnecessary ones. Following these tips can help you get the most out of your Chromebook’s battery life.
How do I share Chrome with a projector?
To share your Chrome browser with a projector, you must first enable the Cast feature on your Chromebook. This can be done by clicking the Wi-Fi icon in the bottom-right corner of your screen, and then selecting the “Cast” option from the dropdown menu. Once you’ve selected this, a list of available devices will be displayed. Select the one you want to cast your Chrome browser onto, and then click “Share”. This will instantly open a new tab in your Chrome browser that is shared with the projector. From there, you can simply navigate around your Chrome browser and control it from your laptop as normal.
What are some tips for using a Chromebook in the classroom?
Using a Chromebook in the classroom can be an effective way to facilitate student learning. To get the most out of your Chromebook, try setting up group projects and leveraging cloud-based tools like Google Docs. Additionally, you can also use your Chromebook to give interactive lectures that encourage students to engage with the material. Furthermore, you can utilize screencasting apps like Screencastify or Cast for Education to record lectures and share them with students afterward. Finally, don’t forget to take advantage of Google’s powerful suite of apps like Gmail, Drive, and Calendar to streamline your workflow and stay organized. With these tips, you can make the most of your Chromebook in the classroom.
Useful Video: Connect Projector to Chromebook
Conclusion Paragraph
To connect a Chromebook to a projector, you must know the connection type of both devices and ensure that compatible adapter cables are used. With a few simple steps, you can be up and running in no time. Many Chromebooks come with built-in screen-sharing features for seamless presentations to any compatible device. Whether your presentation includes audio or visuals, connecting a Chromebook to a projector is easy and efficient. Using these steps, you will be able to create seamless presentations every time.
References:
- https://tech.wrdsb.ca/chromebooks/solutions/connecting-a-chromebook-to-a-projector-monitor-or-television/
- https://www.lifewire.com/connect-chromebook-to-projector-5119084
- https://www.benq.eu/en-eu/business/resource/trends/connect-chromebook-tv-projector.html